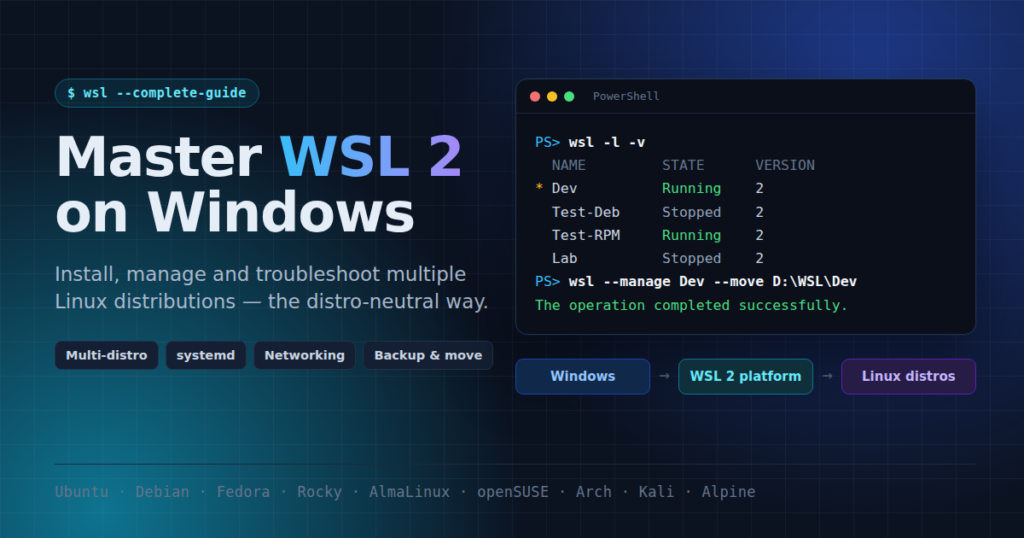

Windows Subsystem for Linux (WSL) has grown from a way to run a few Linux command-line tools on Windows into a full platform for running complete Linux distributions side by side with Windows. Developers, system administrators, DevOps engineers and security professionals can use it to keep several independent Linux environments on a single Windows machine.
This guide is distribution-neutral. It explains how WSL itself works and how to manage any distribution on it, whether that is Ubuntu, Debian, Fedora, a RHEL-compatible distribution such as Rocky Linux or AlmaLinux, openSUSE, Arch Linux, Kali Linux or Alpine. Where commands differ between distributions, they are grouped by distribution family.
The key idea: stop treating WSL as “Linux inside Windows” and start treating it as an environment management platform that hosts as many independent Linux systems as you need.
What this guide covers:
- How WSL is structured, and why that matters for updates and troubleshooting
- Installing WSL and installing, launching and removing distributions
- Configuring WSL globally and per distribution
- Keeping both WSL and every distribution up to date
- Files, storage, networking, services and security
- Storing distributions on another drive or folder
- Backing up, cloning and moving distributions
- GUI applications, VS Code and Docker
- Designing a clean multi-distribution setup
- Troubleshooting and quick-reference tables
A note on names: throughout this guide, <Distro> stands for the name of one of your installed distributions exactly as shown by wsl -l -v (for example Ubuntu, Debian or kali-linux). Replace it with your own distribution name.
Part 1: Understanding WSL
1. WSL and Linux distributions are separate layers
The most important concept in WSL is that WSL and a Linux distribution are not the same thing.
- WSL is the Windows-side platform: the lightweight virtual machine, the Linux kernel Microsoft ships, and the
wsl.exemanagement tool. - A distribution is the Linux userland that runs on that platform: its packages, users, services and files.
Windows
│
└── WSL platform (wsl.exe, WSL 2 VM, Linux kernel)
    │
    ├── Distribution A   (own packages, users, services, files)
    ├── Distribution B
    └── Distribution C
This separation shapes everything else in this guide:
| Layer | Managed with | Updated with |
|---|---|---|
| WSL platform | wsl.exe in PowerShell or Command Prompt | wsl --update |
| Linux distribution | The distribution’s own tools, inside Linux | The distribution’s package manager (apt, dnf, zypper, pacman, apk …) |
Running wsl --update updates WSL only. It never updates the packages inside your distributions. Each distribution has to be updated separately with its own package manager.
2. WSL 1 vs WSL 2
WSL has two architectures:
| WSL 1 | WSL 2 | |
|---|---|---|
| How it works | Translates Linux system calls to Windows | Runs a real Linux kernel in a lightweight utility VM |
| System call compatibility | Partial | Full |
| systemd, Docker, most server software | Limited or unsupported | Supported |
| Performance on Linux filesystem | Slower | Much faster |
Performance on Windows files (/mnt/c) | Faster | Slower |
For almost all modern use, WSL 2 is the version to use. WSL 1 is only worth considering for a few niche cases, such as a workload that must operate mainly on Windows-drive files.
3. Distribution families at a glance
Most day-to-day differences between distributions come down to their family. Knowing a distribution’s family tells you which package manager and conventions to expect.
| Family | Example distributions | Package manager | Admin group | SSH server service |
|---|---|---|---|---|
| Debian-based | Debian, Ubuntu, Kali Linux | apt | sudo | ssh |
| Fedora / RHEL-compatible | Fedora, Rocky Linux, AlmaLinux, Oracle Linux | dnf | wheel | sshd |
| SUSE | openSUSE Tumbleweed, openSUSE Leap, SLES | zypper | Varies (root password is used for sudo by default) | sshd |
| Arch | Arch Linux | pacman | wheel (must be enabled in sudoers) | sshd |
| Alpine | Alpine Linux | apk | wheel (after installing sudo or doas) | sshd (OpenRC, not systemd) |
The rest of this guide uses these families whenever commands differ.
Part 2: Installing WSL and Managing Distributions
4. Installing WSL
On current versions of Windows 10 and Windows 11, open PowerShell as Administrator and run:
wsl --installThis enables the required Windows features, installs WSL and installs a default distribution. Restart Windows if prompted.
To install WSL without any distribution:
wsl --install --no-distributionVerify the installation:
wsl --status
wsl --version
Show every available option:
wsl --help5. Finding and installing distributions
Always check the current online catalog rather than relying on a list copied from an older tutorial, because the available distributions and their exact names change over time:
wsl --list --onlineShort form:
wsl -l -oInstall a distribution using the exact name from the NAME column:
wsl --install <Distro>For example:
wsl --install DebianRecent WSL releases also let you choose a custom name and install location. Check wsl --help to confirm your version supports these options:
wsl --install <Distro> --name <NewName> --location D:\WSL\<NewName>See section 22 for every way to keep distributions on a drive or folder of your choice.
Installing a distribution that is not in the catalog
Some distributions (for example Rocky Linux) publish an official WSL or container root filesystem image instead of appearing in the catalog. Download the image from the distribution’s official website, then import it:
wsl --import <NewName> C:\WSL\<NewName> C:\Downloads\<image>.tarRecent versions of WSL can also install from a distribution package file:
wsl --install --from-file C:\Downloads\<image>.wslOnly use images from the distribution’s official project. A root filesystem from an unknown source is equivalent to running an untrusted operating system.
After importing, a distribution may start as root. See section 11 for creating a normal user and setting it as the default.
6. Listing distributions: the most important command
If you remember only one WSL command, make it this one:
wsl -l -v(Long form: wsl --list --verbose.)
Example output:
  NAME            STATE      VERSION
* Ubuntu          Running    2
  Debian          Stopped    2
  AlmaLinux-9     Stopped    2
  kali-linux      Stopped    2
It tells you:
- which distributions are installed and their exact names
- which one is the default (marked with
*) - whether each is running or stopped
- whether each uses WSL 1 or WSL 2
To list only running distributions:
wsl -l --running7. The default distribution and launching others
Running wsl with no arguments starts the default distribution. To change the default:
wsl --set-default <Distro>In a multi-distribution setup, it is usually better to keep your primary distribution as the default and launch the others explicitly:
wsl -d <Distro>Start a distribution as root (useful for recovery, for example after forgetting a user password):
wsl -d <Distro> -u rootAvoid using root as your everyday account.
8. Running Linux commands from PowerShell
You do not have to open an interactive shell to run a Linux command. Everything after -- is passed to Linux unchanged:
wsl -d <Distro> -- cat /etc/os-release
wsl -d <Distro> -- uname -a
wsl -d <Distro> -- df -h
Without -d, the command runs in the default distribution. This makes WSL easy to script and automate from PowerShell.
9. Stopping distributions and shutting down WSL
Stop a single distribution:
wsl --terminate <Distro>Short form:
wsl -t <Distro>Shut down every distribution and the WSL 2 virtual machine:
wsl --shutdownUse wsl --shutdown after changing .wslconfig or wsl.conf, when troubleshooting, or to release the memory WSL is using. The next wsl command starts everything again.
10. Managing WSL versions
Make WSL 2 the default for newly installed distributions:
wsl --set-default-version 2Convert an existing distribution:
wsl --set-version <Distro> 2Converting a large distribution can take a long time. Back it up first (see Part 7).
Part 3: Configuration
11. Users and the default account
Distributions installed from the catalog usually prompt you to create a user on first launch. Imported distributions often start as root, so create a user yourself.
Create a user and set a password (works on most distributions):
sudo useradd -m -s /bin/bash <username>
sudo passwd <username>
On Debian-based distributions, sudo adduser <username> is an interactive alternative.
Give the user administrative rights by adding them to the admin group for the distribution family:
| Family | Command |
|---|---|
| Debian-based | sudo usermod -aG sudo <username> |
| Fedora / RHEL-compatible | sudo usermod -aG wheel <username> |
| Arch | sudo usermod -aG wheel <username>, then enable the %wheel line with sudo visudo |
| Alpine | Install sudo (or doas), add the user to wheel, then allow wheel in its configuration |
| SUSE | Configure with sudo visudo; by default sudo asks for the root password |
Verify:
id <username>Make the new user the default login for that distribution by adding this to /etc/wsl.conf inside the distribution:
[user]
default=<username>
Then restart the distribution from PowerShell:
wsl --terminate <Distro>If you are already logged in as root in the distribution (for example straight after an import), leave out sudo from the commands above.
12. wsl.conf vs .wslconfig
WSL has two configuration files with different scopes. Mixing them up is a common source of confusion.
| File | Location | Scope | Typical settings |
|---|---|---|---|
wsl.conf | /etc/wsl.conf inside each distribution | One distribution | systemd, default user, automount, hostname, DNS file generation, Windows interop and PATH |
.wslconfig | %USERPROFILE%\.wslconfig on Windows | All WSL 2 distributions (the shared VM) | Memory, CPUs, swap, networking mode, DNS tunnelling, memory reclaim |
.wslconfig   →  the whole WSL 2 virtual machine (every distribution)
wsl.conf     →  one specific distribution
Because each distribution has its own /etc/wsl.conf, changing it in one distribution does not affect the others.
Example /etc/wsl.conf (per distribution):
[boot]
systemd=true

[user]
default=<username>

[network]
hostname=<distro-hostname>
Example %USERPROFILE%\.wslconfig (global):
[wsl2]
memory=8GB
processors=4
swap=4GB
Two further settings solve common complaints:
- WSL keeps using a lot of memory (the
vmmemorVmmemWSLprocess in Task Manager): WSL 2 caches files in memory and does not always hand it back. Recent releases can return unused memory gradually. AddautoMemoryReclaim=gradualto.wslconfig: under[wsl2]on current releases, or under an[experimental]section on older ones. - Commands are slow or pick up Windows tools by mistake: by default, WSL adds the Windows
PATHto Linux. Turn this off for one distribution in/etc/wsl.conf:
[interop]
appendWindowsPath=false
After changing either file, restart WSL so the change takes effect:
wsl --shutdown13. Enabling systemd
WSL 2 supports systemd, which most server software and many administration workflows expect. Some distributions enable it by default; others do not.
Enable it in /etc/wsl.conf inside the distribution:
[boot]
systemd=true
Restart WSL:
wsl --shutdownStart the distribution again and confirm that systemd is PID 1:
ps -p 1 -o comm=The output should be systemd. You can now use systemctl normally:
systemctl statusAlpine Linux uses OpenRC rather than systemd, so this section does not apply to it.
Part 4: Keeping Everything Updated
14. Updating the WSL platform
From PowerShell:
wsl --updateIf the default update method fails (for example in some corporate environments), download the update directly from GitHub instead:
wsl --update --web-downloadCheck the result:
wsl --versionRemember: this updates WSL itself, not your distributions.
15. Updating distributions
Each distribution is updated from inside Linux, using its own package manager.
| Family | Full update command |
|---|---|
| Debian-based | sudo apt update && sudo apt upgrade |
| Fedora / RHEL-compatible | sudo dnf upgrade --refresh |
| openSUSE Leap / SLES | sudo zypper refresh && sudo zypper update |
| openSUSE Tumbleweed | sudo zypper refresh && sudo zypper dist-upgrade |
| Arch | sudo pacman -Syu |
| Alpine | sudo apk update && sudo apk upgrade |
On Arch Linux, always refresh and upgrade together with pacman -Syu. Refreshing the package database without upgrading (pacman -Sy on its own) can leave the system in a broken, partially upgraded state.
You can update a distribution without opening a shell. For example, from PowerShell:
wsl -d <Distro> -u root -- apt update
wsl -d <Distro> -u root -- apt upgrade -y
16. Common package management tasks
| Task | Debian-based | Fedora / RHEL-compatible | SUSE | Arch | Alpine |
|---|---|---|---|---|---|
| Refresh package lists | apt update | dnf check-update | zypper refresh | pacman -Sy (only together with -u) | apk update |
| Upgrade everything | apt upgrade | dnf upgrade | zypper update | pacman -Syu | apk upgrade |
| Install a package | apt install <pkg> | dnf install <pkg> | zypper install <pkg> | pacman -S <pkg> | apk add <pkg> |
| Remove a package | apt remove <pkg> | dnf remove <pkg> | zypper remove <pkg> | pacman -R <pkg> | apk del <pkg> |
| Search | apt search <term> | dnf search <term> | zypper search <term> | pacman -Ss <term> | apk search <term> |
| Package details | apt show <pkg> | dnf info <pkg> | zypper info <pkg> | pacman -Si <pkg> | apk info <pkg> |
| List installed | apt list --installed | dnf list --installed | zypper search --installed-only | pacman -Q | apk info |
| List repositories | apt policy | dnf repolist | zypper repos | pacman.conf | /etc/apk/repositories |
| Remove unused dependencies | apt autoremove | dnf autoremove | zypper packages --unneeded (review, then remove) | pacman -Qdtq (review, then remove) | Not required |
| Clean package cache | apt clean | dnf clean all | zypper clean | pacman -Sc | apk cache clean |
Commands that change the system need sudo (or a root shell).
Repositories: be cautious with third-party repositories on any distribution. They can introduce package conflicts and make a test environment less representative of a standard installation.
Part 5: Files and Storage
17. Windows and Linux filesystems
Windows drives are mounted inside every distribution under /mnt:
C:\Users\<you>\Projects → /mnt/c/Users/<you>/ProjectsIn the other direction, Windows can browse each distribution’s files through a network path. In File Explorer, enter:
\\wsl.localhost\Each running distribution appears as a folder, for example \\wsl.localhost\<Distro>\home\<username>. The older \\wsl$\ path still works too.
From inside Linux, open the current directory in File Explorer with:
explorer.exe .18. Where to store your files
This is the single biggest performance decision in WSL 2. Accessing files across the Windows/Linux boundary is much slower than accessing files on the same side.
Rule of thumb: keep Linux workloads on the Linux filesystem and Windows workloads on the Windows filesystem.
Prefer:
/home/<username>/projectsover:
/mnt/c/Users/<you>/projectsThis matters most for workloads with many small files, such as:
- Git repositories
- Node.js, Python and other language environments
- Builds and compilers
- Package managers
- Databases
- Container workloads
19. Checking disk usage
Each WSL 2 distribution is stored in its own virtual disk file (ext4.vhdx) on Windows.
Check filesystem usage inside a distribution:
df -hFind the largest directories, staying on the Linux filesystem (-x) so /mnt/c is not scanned:
sudo du -xh --max-depth=2 / 2>/dev/null | sort -h | tail -30Check your home directory and common growth areas:
du -sh ~
sudo du -sh /var/* 2>/dev/null | sort -h
Large consumers are usually databases, container images, package caches, build output and big Git repositories.
20. Cleaning up safely
Start with the package manager’s own clean-up commands (see the table in section 16), for example sudo apt autoremove && sudo apt clean or sudo dnf autoremove && sudo dnf clean all.
Do not delete files from system directories simply because they are large. A distribution may contain SSH keys, credentials, databases, application configuration, service data and source code that you cannot recreate.
21. Reclaiming virtual disk space
Deleting files inside Linux frees space in the distribution, but the ext4.vhdx file on Windows does not automatically shrink. Recent versions of WSL can make a distribution’s disk sparse so that freed space is returned to Windows:
wsl --terminate <Distro>
wsl --manage <Distro> --set-sparse true
This option is only available in recent WSL releases; run wsl --help to confirm. Back up the distribution first (Part 7).
22. Storing distributions on another drive or folder
By default, every distribution’s virtual disk lives on the system drive, usually somewhere under %LOCALAPPDATA%. Large distributions can quickly fill C:, so it is common to keep them on another drive, for example D:\WSL\.
Find where a distribution is stored
WSL records each distribution’s location in the Windows registry. List every distribution with its folder from PowerShell:
Get-ChildItem HKCU:\Software\Microsoft\Windows\CurrentVersion\Lxss |
  ForEach-Object { Get-ItemProperty $_.PSPath } |
  Select-Object DistributionName, BasePath
The ext4.vhdx file inside BasePath is the distribution’s virtual disk.
Option 1: Choose the location when installing
On recent WSL releases, install a distribution directly into the folder you want:
wsl --install <Distro> --location D:\WSL\<Distro>Add --name <NewName> to give it a custom name at the same time.
Option 2: Move an existing distribution (recent WSL releases)
wsl --terminate <Distro>
wsl --manage <Distro> --move D:\WSL\<Distro>
The distribution keeps its name, default user and settings. Check that wsl --help lists --manage before relying on this.
Option 3: Export and import (works on every WSL 2 version)
This is the traditional method, and it also works when --move is not available.
1. Stop the distribution and export it:
wsl --terminate <Distro>
wsl --export <Distro> D:\Backups\<Distro>.tar
2. Check the export before going further. It should be roughly the size of the data in the distribution, and Windows’ built-in tar should be able to list its contents:
tar -tf D:\Backups\<Distro>.tar | Select-Object -First 103. Remove the original registration:
wsl --unregister <Distro>Warning: this deletes the original distribution and all its data. Only run it once you are sure the export from step 1 is complete and readable.
4. Import it into the new folder under the same name:
wsl --import <Distro> D:\WSL\<Distro> D:\Backups\<Distro>.tar5. Restore the default user. An imported distribution logs in as root, so set the default user again in /etc/wsl.conf (section 11) and restart it with wsl --terminate <Distro>.
Keep the .tar file until you have used the moved distribution for a while and are sure everything is in place.
If you prefer not to unregister anything until the new copy is proven, import it under a different name first (for example <Distro>-New), test it, and only then unregister the original.
Tips for the target folder
- Use a local NTFS drive. Removable drives, network shares and cloud-synced folders (such as OneDrive) cause corruption and performance problems.
- Use one folder per distribution, for example
D:\WSL\DevandD:\WSL\Test-RPM. - Exclude the folder from real-time antivirus scanning only if your organisation’s policy allows it; scanning large
.vhdxfiles can slow WSL down.
Part 6: Networking, Services and Security
23. How WSL networking works
WSL 2 supports two main networking modes, set in .wslconfig:
| Mode | How it works | Typical behaviour |
|---|---|---|
| NAT (default) | The WSL VM sits on a private virtual network behind Windows | Services in WSL are reachable from Windows via localhost; other devices on your LAN cannot reach them without extra configuration |
| Mirrored (Windows 11 22H2 and later) | WSL mirrors the Windows network interfaces | Linux sees the same IP addresses as Windows; better compatibility with VPNs, IPv6 and LAN access |
Enable mirrored mode in %USERPROFILE%\.wslconfig:
[wsl2]
networkingMode=mirrored
dnsTunneling=true
Then run wsl --shutdown.
Get a distribution’s IP address from PowerShell:
wsl -d <Distro> -- hostname -IIn NAT mode this is an internal address that can change after each restart. In mirrored mode it matches the Windows host’s addresses.
Basic network inspection inside Linux:
ip addr
ip route
cat /etc/resolv.conf
sudo ss -tulpn(ss needs sudo to show which process owns each port. On minimal distributions you may need to install the iproute2 package or equivalent first.)
24. Managing services with systemd
With systemd enabled (section 13), services are managed the same way as on any systemd-based Linux system:
sudo systemctl status <service>
sudo systemctl start <service>
sudo systemctl stop <service>
sudo systemctl restart <service>
sudo systemctl enable <service>
sudo systemctl enable --now <service>
Check for failed services and read a service’s logs:
systemctl --failed
journalctl -u <service>
Service names sometimes differ between families. For example, the OpenSSH server is ssh on Debian-based distributions and sshd on Fedora, RHEL-compatible, SUSE and Arch distributions.
WSL distributions stop when they have been idle for a while, and their services stop with them. systemctl enable makes a service start whenever the distribution starts, not when Windows boots.
25. Example: running a web server
Install Nginx using your distribution’s package manager:
| Family | Command |
|---|---|
| Debian-based | sudo apt install nginx |
| Fedora / RHEL-compatible | sudo dnf install nginx |
| SUSE | sudo zypper install nginx |
| Arch | sudo pacman -S nginx |
Start it and enable it:
sudo systemctl enable --now nginx
sudo systemctl status nginx
Confirm that it is listening on port 80:
sudo ss -tulpn | grep ':80 'Then open http://localhost in a Windows browser.
26. Firewalls and security modules
Linux firewalls work differently in WSL than on a normal server, and a service can be blocked at several layers:
Application (is it running and bound to the right address?)
    ↓
Linux firewall (firewalld, ufw, nftables)
    ↓
WSL networking mode (NAT or mirrored)
    ↓
Windows Firewall / Hyper-V firewall
    ↓
Physical network
Opening a port in firewalld or ufw does not by itself make a service reachable from other computers on your network. In NAT mode you also need Windows port forwarding; in mirrored mode you need a matching Windows or Hyper-V firewall rule.
Exposing a service to your LAN in NAT mode. Run these in PowerShell as Administrator, replacing <WSL-IP> with the address from wsl -d <Distro> -- hostname -I and 8080 with your port:
netsh interface portproxy add v4tov4 listenaddress=0.0.0.0 listenport=8080 connectaddress=<WSL-IP> connectport=8080
New-NetFirewallRule -DisplayName "WSL 8080" -Direction Inbound -Protocol TCP -LocalPort 8080 -Action Allow
List or remove forwarding rules:
netsh interface portproxy show v4tov4
netsh interface portproxy delete v4tov4 listenaddress=0.0.0.0 listenport=8080
In NAT mode the WSL address can change after a restart, so the rule may need updating. Mirrored mode avoids this.
Common Linux firewall front-ends, if you want to practise with them:
| Family | Typical firewall tool | Check status |
|---|---|---|
| Debian / Ubuntu | ufw | sudo ufw status |
| Fedora / RHEL-compatible / SUSE | firewalld | sudo firewall-cmd --state and sudo firewall-cmd --list-all |
| Any | nftables | sudo nft list ruleset |
SELinux and AppArmor: the Linux kernel that Microsoft ships for WSL does not enforce SELinux or AppArmor policies. On RHEL-compatible and Fedora distributions, getenforce typically reports Disabled. If you need to test mandatory access control policies, kernel behaviour or production-like network security, use a full virtual machine instead (see section 35).
Part 7: Backup, Cloning and Removal
27. Backing up a distribution
Export a distribution to a TAR file:
wsl --export <Distro> D:\Backups\<Distro>-2026-09-27.tarThe export contains the distribution’s entire filesystem: installed software, configuration, users and data. Store backups outside the distribution itself, ideally on another drive or backup system, and include a date in the file name.
WSL 2 can also export the raw virtual disk, which is usually faster for large distributions:
wsl --export <Distro> D:\Backups\<Distro>.vhdx --vhdStop the distribution with wsl --terminate <Distro> before exporting to get a consistent backup, especially if it runs databases.
28. Restoring or importing a distribution
General syntax:
wsl --import <NewName> <InstallLocation> <BackupFile>Restore from a TAR export:
wsl --import <Distro>-Restore C:\WSL\<Distro>-Restore D:\Backups\<Distro>.tarRestore from a VHDX export:
wsl --import <Distro>-Restore C:\WSL\<Distro>-Restore D:\Backups\<Distro>.vhdx --vhdAn imported distribution may log in as root by default. Set the default user in /etc/wsl.conf as described in section 11.
29. Cloning a distribution
Export and import together let you create an independent copy of any distribution:
wsl --export <Distro> D:\Backups\<Distro>-base.tar
wsl --import <Distro>-Test C:\WSL\<Distro>-Test D:\Backups\<Distro>-base.tar
The clone is completely independent of the original. Clones are useful for:
- Testing an upgrade before applying it to your main environment
- Creating disposable experiment environments
- Keeping a known-good baseline you can return to
30. Removing a distribution: wsl --unregister
Warning:
wsl --unregister <Distro>permanently deletes the distribution and all of its data, including home directories, databases and keys. There is no recycle bin and no undo.
Safe procedure:
- Export the distribution:
wsl --export <Distro> D:\Backups\<Distro>-final.tar - Verify the backup exists and has a sensible size. For important data, test it by importing it under a temporary name.
- Only then run:
wsl --unregister <Distro>Never use --unregister as a quick way to “reset” a distribution that contains anything you care about.
Part 8: Everyday Workflows and Environment Design
31. Windows and Linux interoperability
From Linux, you can run Windows programs directly:
explorer.exe .
notepad.exe file.txt
powershell.exe -Command "Get-Date"
From Windows, you can run Linux commands with wsl -d <Distro> -- <command> (section 8). This lets you combine Linux command-line tools with Windows applications in the same workflow.
32. Linux GUI applications (WSLg)
WSL 2 can run graphical Linux applications through a built-in component called WSLg. No extra X server is needed on Windows 11 or recent Windows 10 builds. Install a GUI application with your package manager and start it from the shell:
gedit &(Use your distribution’s package manager to install it first, for example sudo apt install gedit or sudo dnf install gedit.)
The application opens in its own window and often appears in the Windows Start menu too. If nothing appears, run wsl --update and wsl --shutdown, then try again.
33. Editors and containers
Visual Studio Code. With the *WSL* extension installed on Windows, run this inside any distribution to open the current folder:
code .VS Code runs its interface on Windows and its language tools inside the distribution, so projects stay on the fast Linux filesystem.
Docker. There are two common approaches:
- Docker Desktop runs on Windows and can be connected to chosen distributions under *Settings → Resources → WSL integration*.
- Docker Engine inside a distribution: install Docker directly with the distribution’s package manager or Docker’s official repository. This needs systemd (section 13).
Use one approach or the other in a given distribution; mixing them causes confusing conflicts.
34. Git and SSH
Install Git and an SSH client with your distribution’s package manager:
| Family | Command |
|---|---|
| Debian-based | sudo apt install git openssh-client |
| Fedora / RHEL-compatible | sudo dnf install git openssh-clients |
| SUSE | sudo zypper install git openssh |
| Arch | sudo pacman -S git openssh |
| Alpine | sudo apk add git openssh-client |
Configure Git (once per distribution, because each has its own home directory):
git config --global user.name "Your Name"
git config --global user.email "you@example.com"
git config --global --list
Line endings: if the same repository is used from Windows and from Linux, stop Git from converting line endings inside WSL, otherwise shell scripts can fail with errors such as /bin/bash^M: bad interpreter:
git config --global core.autocrlf inputGenerate an SSH key and connect to a server:
ssh-keygen -t ed25519
ssh <username>@<server>
Keep repositories under /home/<username>/projects rather than /mnt/c for good performance (section 18).
35. WSL or a full virtual machine?
WSL 2 uses virtualization, but it is designed for integration with Windows, not isolation from it.
| Choose WSL when you need… | Choose a full VM when you need… |
|---|---|
| Linux development tools on a Windows desktop | Complete isolation from the host |
| Fast access to Windows files and applications | A custom or distribution-specific kernel |
| Several lightweight Linux environments | SELinux/AppArmor enforcement and kernel-level security testing |
| Shell scripting, Git, SSH and DevOps tooling | Precisely controlled virtual networks |
| Application-level testing across distributions | Hardware passthrough or exact production reproduction |
WSL and virtual machines solve overlapping but different problems. Many people use both.
36. Windows Terminal
Windows Terminal automatically creates a profile for each installed distribution, so every environment can have its own tab, colour scheme and starting directory. Instead of typing wsl -d <Distro> each time, open the matching profile. For multi-distribution setups, it quickly becomes an essential tool.
37. Designing a multi-distribution setup
Multiple distributions make WSL a compact Linux lab. The key is to give every distribution a clear purpose. A typical layout pairs one primary development distribution with others chosen to match your deployment targets:
Windows
│
└── WSL 2
    │
    ├── Dev         Primary development (any distribution you prefer)
    ├── Test-Deb    Debian-based compatibility testing
    ├── Test-RPM    Fedora / RHEL-compatible testing (dnf, RPM, firewalld)
    └── Lab         Isolated experiments or security tooling
A useful workflow when you develop on one distribution but deploy to another:
Dev distribution
  ├── Develop
  ├── Unit test
  └── Commit
        │
        ▼
Test distribution matching production
  ├── Install dependencies with the native package manager
  ├── Deploy the application
  ├── Test systemd units and web server configuration
  └── Verify configuration paths and service names
        │
        ▼
Production servers
This does not make WSL an exact copy of production, but it catches many packaging, path and service-configuration differences early.
38. Avoiding the “distro graveyard”
A common problem is installing distributions just because they are available, until wsl -l -v looks like this:
Ubuntu
Ubuntu-2
Ubuntu-Test
Debian
Debian-Old
Fedora
Fedora-Old
Rocky-Test
kali-linux
…and nobody remembers what each one is for.
Prevent it with a few habits:
- Use descriptive names when importing or installing (
--name), such asDev,Test-RPMorUpgrade-Test-2026-09. - Keep a simple inventory of each distribution and its purpose.
- Review regularly with
wsl -l -v. - Back up, then remove environments you no longer need.
Part 9: Troubleshooting
39. A structured troubleshooting process
When something goes wrong, work through the layers in order instead of reinstalling. Reinstalling destroys evidence and often data.
Step 1 – Check the WSL platform (PowerShell):
wsl --status
wsl --version
wsl -l -v
Step 2 – Restart WSL:
wsl --shutdown
wsl -d <Distro>
Step 3 – Check the distribution (Linux):
cat /etc/os-release
uname -a
df -h
Step 4 – Check services (if using systemd):
systemctl --failedStep 5 – Check networking (section 42).
Step 6 – Update WSL with wsl --update if the problem looks like a platform bug.
Only consider destructive actions after you have a verified backup.
40. WSL will not install or start at all
If wsl --install fails, or every distribution fails with an error such as 0x80370102, or a message mentioning virtualization or “Virtual Machine Platform”, check the basics:
- Hardware virtualization is enabled in the BIOS/UEFI (Intel VT-x or AMD-V/SVM). Task Manager → Performance → CPU shows *Virtualization: Enabled* when it is on.
- The Virtual Machine Platform feature is enabled. In PowerShell as Administrator:
dism.exe /online /enable-feature /featurename:VirtualMachinePlatform /all /norestart
dism.exe /online /enable-feature /featurename:Microsoft-Windows-Subsystem-Linux /all /norestart
Then restart Windows and run wsl --update.
If the error persists, check that no other hypervisor setting or security software is blocking virtualization.
41. A distribution will not start or appears stuck
- Check its state with
wsl -l -v. - If it shows as
Runningbut does not respond, terminate it:wsl --terminate <Distro>. - Start it again:
wsl -d <Distro>. - If several distributions are affected, run
wsl --shutdownand try again. - If a recent
/etc/wsl.confchange is the likely cause, start as root withwsl -d <Distro> -u rootand fix or rename the file. If the distribution will not start even as root, runwsl -d <Distro> -u root -- mv /etc/wsl.conf /etc/wsl.conf.bakfrom PowerShell and try again. - Run
wsl --updatein case the problem is a fixed platform bug.
42. Network and DNS problems
When a network problem appears, test one layer at a time. Each command answers a different question:
| Test | Command | Question it answers |
|---|---|---|
| Interfaces | ip addr | Does the distribution have an IP address? |
| Routing | ip route | Is there a default route? |
| DNS configuration | cat /etc/resolv.conf | Which DNS server is the distribution using? |
| Name resolution | getent hosts example.com | Can DNS resolve a name? |
| Connectivity | curl -I https://example.com | Can the system actually make an HTTPS connection? |
If name resolution works but curl fails, the problem is not DNS. Look at proxies, VPNs, firewalls or certificates instead.
If DNS fails, common fixes are enabling dnsTunneling=true in .wslconfig, or turning off automatic DNS generation in /etc/wsl.conf and writing your own /etc/resolv.conf:
[network]
generateResolvConf=false
After any network configuration change, run wsl --shutdown and start the distribution again.
43. A service is not reachable
Do not assume WSL networking is broken. First confirm that the application is actually listening:
sudo ss -tulpnExample output:
LISTEN 0 511   0.0.0.0:80     0.0.0.0:*   users:(("nginx",pid=210,fd=6))
LISTEN 0 4096  127.0.0.1:5432 0.0.0.0:*   users:(("postgres",pid=180,fd=7))
Then work through these questions in order:
- Is the application running?
- Is it listening on the expected port?
- Which address is it bound to?
127.0.0.1accepts local connections only;0.0.0.0accepts connections on all interfaces. - Is a Linux firewall blocking the port?
- Which WSL networking mode is in use, NAT or mirrored?
- Is Windows Firewall or the Hyper-V firewall blocking it?
- Is the client on the same Windows machine or a different computer?
This method is far more reliable than changing network settings at random.
Part 10: Quick Reference
44. WSL command reference
| Purpose | Command |
|---|---|
| Install WSL (and default distribution) | wsl --install |
| Install WSL without a distribution | wsl --install --no-distribution |
| Show status | wsl --status |
| Show version | wsl --version |
| Update WSL | wsl --update |
| List installed distributions | wsl -l -v |
| List running distributions | wsl -l --running |
| List available distributions | wsl -l -o |
| Install a distribution | wsl --install <Distro> |
| Install to a chosen folder | wsl --install <Distro> --location <Folder> |
| Start the default distribution | wsl |
| Start a specific distribution | wsl -d <Distro> |
| Start as root | wsl -d <Distro> -u root |
| Run one command | wsl -d <Distro> -- <command> |
| Set the default distribution | wsl --set-default <Distro> |
| Set the default WSL version | wsl --set-default-version 2 |
| Convert a distribution to WSL 2 | wsl --set-version <Distro> 2 |
| Stop a distribution | wsl --terminate <Distro> |
| Stop all of WSL | wsl --shutdown |
| Export (TAR) | wsl --export <Distro> <file>.tar |
| Export (VHDX) | wsl --export <Distro> <file>.vhdx --vhd |
| Import | wsl --import <NewName> <InstallLocation> <file>.tar |
| Move a distribution | wsl --manage <Distro> --move <NewLocation> |
| Make the virtual disk sparse | wsl --manage <Distro> --set-sparse true |
| Remove a distribution (deletes data!) | wsl --unregister <Distro> |
| Get a distribution’s IP address | wsl -d <Distro> -- hostname -I |
| Show help | wsl --help |
45. Package manager quick reference
| Family | Update everything | Install | Remove | Clean cache |
|---|---|---|---|---|
| Debian-based | apt update && apt upgrade | apt install | apt remove | apt clean |
| Fedora / RHEL-compatible | dnf upgrade --refresh | dnf install | dnf remove | dnf clean all |
| SUSE | zypper refresh && zypper update | zypper install | zypper remove | zypper clean |
| Arch | pacman -Syu | pacman -S | pacman -R | pacman -Sc |
| Alpine | apk update && apk upgrade | apk add | apk del | apk cache clean |
Prefix each command with sudo when not working as root.
46. Routine maintenance checklist
Windows / WSL layer (PowerShell):
wsl --update
wsl --version
wsl -l -v
Every distribution (Linux):
- Update packages with the native package manager (section 15)
- Check disk usage with
df -h - Check for failed services with
systemctl --failed(systemd distributions) - Clean package caches occasionally (section 16)
Periodically:
- Export important distributions with
wsl --export - Review the distribution list and remove ones you no longer need, after backing them up
Final Thoughts
WSL is best understood not as a single Linux installation but as a Linux environment management layer built into Windows:
                     Windows
                        │
                        ▼
                      WSL 2   ← wsl --update, .wslconfig
                        │
        ┌───────────────┼───────────────┐
        ▼               ▼               ▼
  Distribution A  Distribution B  Distribution C   ← /etc/wsl.conf each
        │               │               │
       apt             dnf           zypper / pacman / apk
        │               │               │
        └───────────────┴───────────────┘
                        │
           Tools, services, development,
               administration, testing
The principles that make a WSL installation reliable over the long term:
- Maintain both layers. Update WSL with
wsl --update, and update every distribution with its own package manager. - Prefer WSL 2 unless you have a specific reason not to.
- Give every distribution a purpose and a descriptive name.
- Keep Linux workloads on the Linux filesystem for performance.
- Enable systemd deliberately where services need it.
- Understand the networking layers before changing settings.
- Back up with
wsl --exportbefore risky changes. - Never run
wsl --unregistercasually. It deletes everything in that distribution. - Troubleshoot layer by layer instead of rebuilding.
Managed this way, WSL becomes much more than a Bash prompt on Windows. It becomes a flexible multi-distribution Linux workstation, development platform, administration console and test lab, while keeping the convenience of the Windows desktop.